Since version 6.20 it is possible to categorise the items in Outlook by default categories and by customized categories.
4.12.1. Create a custom category in Outlook 2007
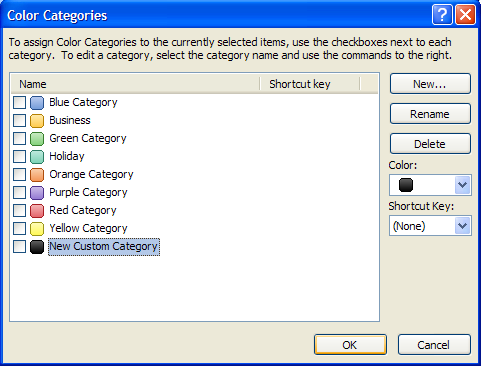
To create a custom category, click on the Categorise button in the Outlook toolbar and choose All Categories.
The Color Categories window will appear; choose New to add a new category.
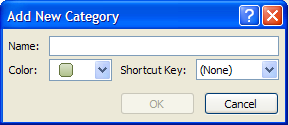
The New Category window will appear; fill in the name of the category, choose a color to represent it and optionally a shortcut key.
Click on OK and the new category will be automatically added to the available categories in the Color category window.
Figure 4.19. Categorys in Outlook 2007
Figure 4.20. Add category in Outlook 2007
4.12.2. Create a custom category in Outlook 2000/2003
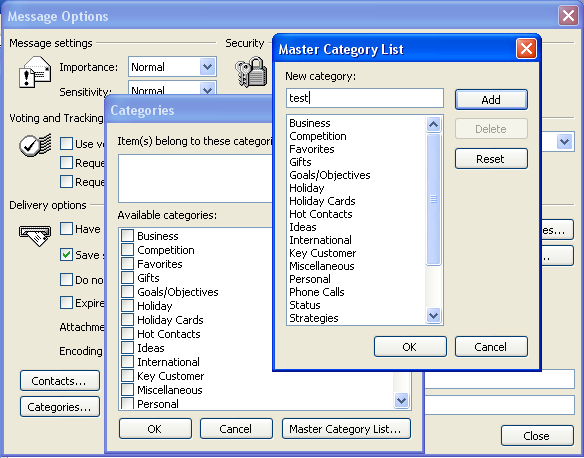
Open a new mail and choose in the taskbar for options.
Choose in this window (message options) for categories, and then for Master category list.
Type the name for the new category and add this with the Add button.
After creating the category, confirm with the OK buttons in the open windows.
Figure 4.21. Add category in Oulook 2000/2003
4.12.3. Categorise items and sort by category
In order to categorise an item (it is possible to categorise Mail, Contacts and Appointments) right click on it, choose Categorise and then click on the desired category.
To order the items by category open the View menu, choose Arrange by or Current View and then Categories.