4.2.1. The creation of a public folder
By default, every user is able to create folders and items in the Public folders. However, the permissions on these new items are set so that a new folder can only be read by other users.
To enable others to write to the folder, the correct permissions must be set; for example allow writing and deleting by the group Everyone. (See Sharing of folders).
4.2.2. Sharing of folders (setting permissions)
The permission structure has been built with flexibility in mind. It is possible to set permissions per folder. Every folder inherits the permissions of the folder it is located in. Every item inherits the permissions of the folder it is contained in.
Before a folder can be added and viewed by other users, the permissions have to be set correctly.
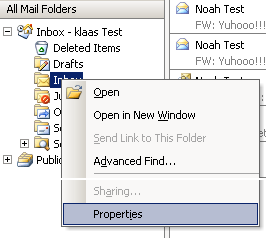
To accomplish this, right click on a folder and choose Properties.
In the appearing dialog window different settings can be chosen, regarding the properties of the folder. The last tab window contains the permissions settings.
At the top is a list with users and the permissions which have been set. After selecting a user the rights can be selected at the bottom. Choosing a profile from the drop down list makes this easier by automatically selecting often used settings.
Users can be added and deleted with the two buttons below the user list.
For example, to give user Pete the rights to read and write to items in a folder, first click Add…. After selecting Pete and clicking OK, Pete will show up in the list. After this the right checkboxes can be set; to enable reading and writing only set Read items and Edit items on All.
Table 4.1. Explanation of permissions
|
Permissions
|
Description
|
|---|
|
Create items
|
The user can create items
|
|
Read items
|
The user can read items
|
|
Edit all items
|
The user can edit all items
|
|
Edit own items
|
The user can only edit their own items
|
|
Delete all items
|
The user can delete all items
|
|
Delete own items
|
The user can only delete their own items
|
|
Create subfolders
|
The user can create subfolders
|
|
Folder visible
|
The user can view the folder
|
|
Folder permissions
|
The user can change permissions on the folder
|
If there are no check boxes selected for a user, then denying permissions are in effect and the user can not access the folder.
By default a user only has read/write permissions on their own folders and is able to create folders in the Public Folders.
The owner is saved with every item. This way, depending on the set permissions, a user is only allowed to delete their own items and not items belonging to other users. The owner of the mail box can always edit or delete all items in his/her mail box, regardless of the owner of the items.
It is possible to give administrative rights to users, after which they have access to the entire Zarafa system. These administrators have the ability to change the permissions on public folders and the folders of each user on the system. Also, every folder or item can be opened by an administrator.
Changed since 5.10: All Access Control Lists (ACL's) on a folder are added together for the user. The rights that are given to groups are thus added to grant the user all the rights they may receive through these groups. This will give the user the maximum combination of access rights that have been configured for the user and for the groups the user is a member of.
4.2.3. Adding or opening folders shared by other users
To add shared folders of other users and to be able to write to or read from it, the following steps should be executed:
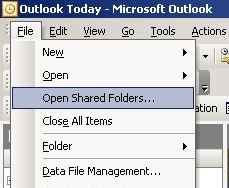
Click in Outlook on File and Open Shared Folders….
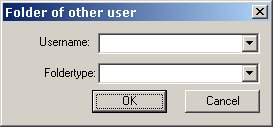
Choose in the dialog window the user and the type of folder to be opened, then click OK.
If Inbox is chosen (permanent), then not only a folder be opened but an extra mail box will be added in the folder list of Outlook. This folder will appear in a separate Outlook window with the folders described as (temporary).
It is only possible to read or write to this folder after the owner has given the rights to do so. See the previous paragraph about setting permissions.
4.2.4. Adding or removing complete stores of other Zarafa users
In order to delete mail boxes (also called stores) which were added to the list of mail boxes in the folder list of Outlook, the user must do the following:
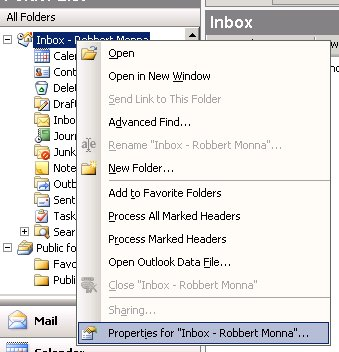
Click with the right mouse button on a mail box:
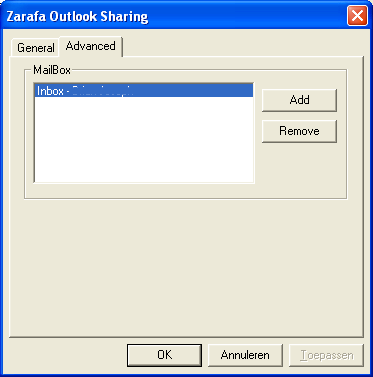
Select Properties > click Advanced… > select the tab Advanced in the Zarafa server dialog window.
Click Remove to remove or Add to add a mail box.
After clicking Add, select a user to add his/her store and let the store appear in the folder list of Outlook.