It is simply a case of adding an ‘Exchange server’ to the ActiveSync server list by specifying the IP address of the Z-Push Apache server, disabling SSL, unless SSL has already been setup on the Apache server, setting the correct username & password (the domain is ignored, simply specify domain or some other random string), and then go through the standard ActiveSync settings.
Once the mobile device has been setup, it should be possible to synchronise the device simply by clicking the Sync button in ActiveSync.
7.2.1. ActiveSync based configuration
The following steps are made for the Pocket PC, though still applicable for WM 5/6 or Nokia’s ‘Mail for Exchange’:
Open ActiveSync and select set up your device to sync with it.
Figure 7.1. ActiveSync introduction
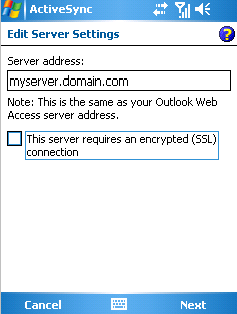
Type the server address (without http or other URL parts).
Figure 7.2. Server address
Specify a username and password, a domain must be specified but it is not used within Z-Push, so simply domain or some other random text can be specified. Select save password if automatic sync is preferred.
Figure 7.3. Account details
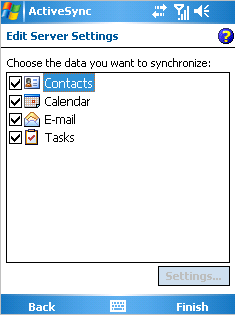
Select which items must be synchronised.
Figure 7.4. Synchronise options
Press Finish and start synchronising by pressing Sync.
7.2.2. iPhone based configuration
The following steps are applicable for the iPhone:
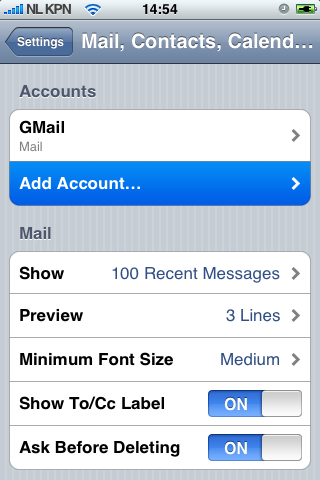
Open Settings and touch Mail, Contacts, Calendars.
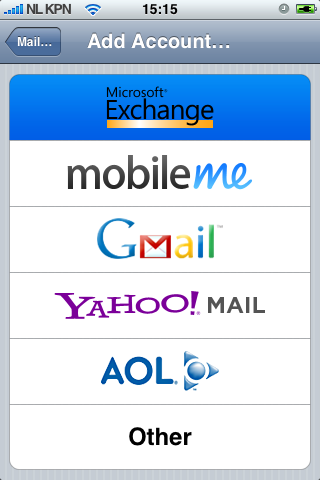
Touch Add Account… and touch Microsoft Exchange.
Figure 7.5. Mail, Contacts, Calendars settings
Figure 7.6. Choice Protocol/Provider
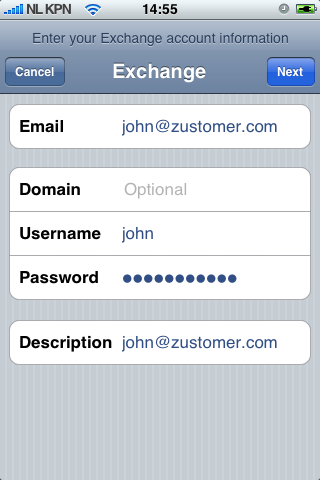
Enter the user credentials, and touch Next.
Figure 7.7. User settings
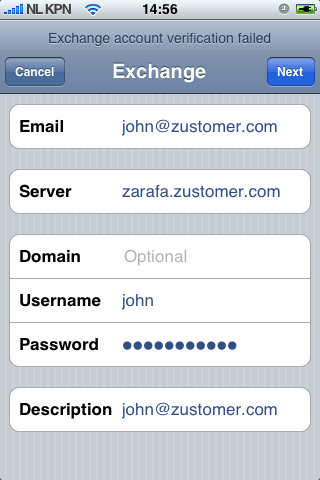
The device will try to contact the server. If the server is not equal to zustomer.com in this case, the connection will fail. If the server is not configured for SSL connections, the connection will fail too. The iPhone has SSL enabled by default.
A new option field Server will pop up. Enter the correct server address or IP if necessary.
Figure 7.8. Extra server field
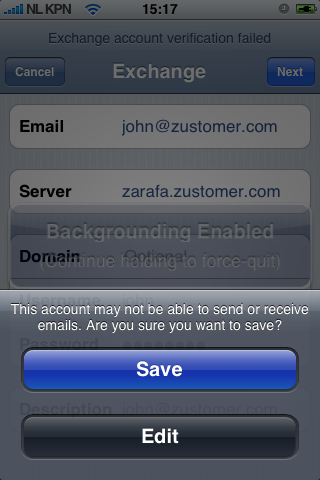
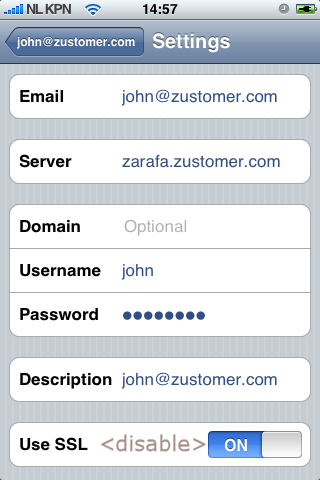
If SSL is not available the connection will fail to be established. Touch Save in order to keep the current account settings. Go to the just created account and touch Account info and disable Use SSL.