Product SiteDocumentation Site

3.4. Email in WebApp

3.4.1. Compose and send a new email in WebApp

  1. Select the button New in the left corner. This will show a dialog like Figura 3.6, “Create Mail”.
    Create Mail
    Figura 3.6. Create Mail

  2. Attachments can be added to the email by selecting the Attachment button or the Paperclip icon.
  3. Email can be saved by selecting the Floppy disk icon. After a email is saved, it is stored in the Drafts folder.
  4. To set a flag that marks the email as important or high priority, click on the exclamation mark (!) icon or the cog symbol.
  5. To add a recipient, either add their email address in the TO, CC, or BCC field manually, or select a person from the Address Book. To access the Address Book, click on the TO, CC or BCC button.
  6. To show the BCC field clock on the recipients field top button.
  7. The internal users are shown by default (unless otherwise selected in Settings) in the Address Book (see: Figura 3.7, “Address Book”). By using the Show names from the: drop-down menu, it is possible to view contacts from either a personal contacts folders or a Public contact folder. Alternatively, it is possible to search a folder using the search field positioned in the top left of the window.
Address Book
Figura 3.7. Address Book

3.4.1.1. Automatic email address suggestion in WebApp

When typing an email address or contact information in the TO, CC or BCC fields the WebApp automatically suggests names (a feature often known as auto complete). The suggestions are listed below the input field (see: Figura 3.8, “Automatic Suggestions”) and a suggestion can be selected by both mouse or keyboard. The suggestions are based on email addresses and contact information that have been used before.
Automatic suggestions
Figura 3.8. Automatic Suggestions

3.4.1.2. Attachments in WebApp

You can attach files to your message by clicking the Attachments button in the Create E-Mail screen. A window will open, which allows files to be uploaded.

3.4.1.3. Saving an email to drafts in WebApp

Saving an email is possible by clicking the Save (a floppy disk) icon. After saving the email, it is stored in the Drafts folder.

3.4.2. Copy, move and delete email in WebApp

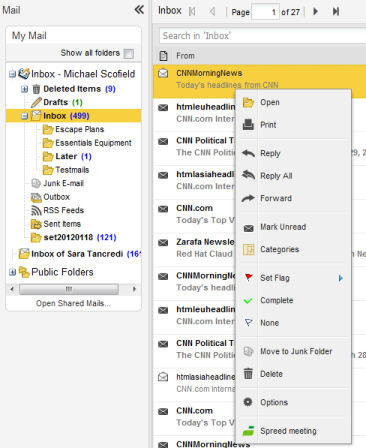
The following screenshot (
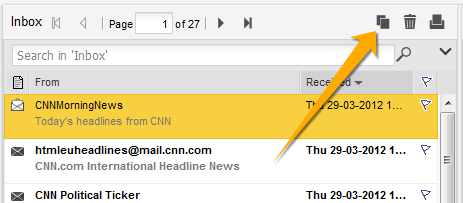
Figura 3.9, “Context menu from a mail message”) shows the context menu that shows up when clicking with the right mouse button on an email. Through this menu most copy, move and delete operations are performed. It also is possible to download a message as a file.
Context menu from a mail message
Figura 3.9. Context menu from a mail message

3.4.2.1. Delete email in WebApp

There are several ways to delete email. They are:

3.4.2.2. Move email in WebApp

To move a single items it is most convenient to simply drag the item to its new location. Place the mouse cursor over the item to be moved, click and hold the left mouse button. Continue to hold the button down while moving the mouse cursor until it is over the folder the message needs to be placed.
Moving email
Figura 3.10. Moving Email

Notice that the folder names under the mouse cursor are highlighted while moving. This highlighting marks the folder where the message will be placed when releasing the button.
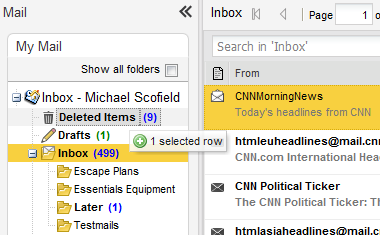
To move multiple items, first select all the items (only items that are currently visible can be moved). To select a range of items click on the first item and then press and hold the shift button on the keyboard. Before releasing the shift button, use the mouse to click on the last item in the range that needs to be moved. All items between the two items clicked on will become highlighted.
With items that are not consecutive, hold down the control (Ctrl) button on the keyboard while clicking on each item. To drag and drop these items, release the control button, place the mouse cursor on one of the selected messages, drag them into the designated folder.
Items can also be moved by clicking on the copy/move button as displayed in Figura 3.11, “Copy/Move Button”.

3.4.2.3. Copy email in WebApp

To copy an item, the drag-and-drop feature can not be used as it does not duplicate items. Instead use the copy/move button as shown in Figura 3.11, “Copy/Move Button”. See the section above about moving multiple items for an explanation concerning how to select multiple items.
Copy/Move button
Figura 3.11. Copy/Move Button

3.4.2.4. Change email view in WebApp

Context menu from a mail view column
Figura 3.12. Context menu form a mail view column

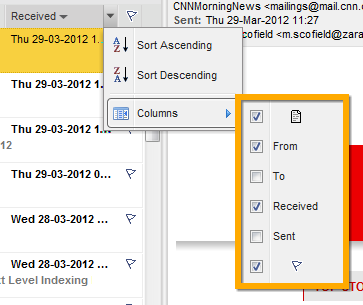
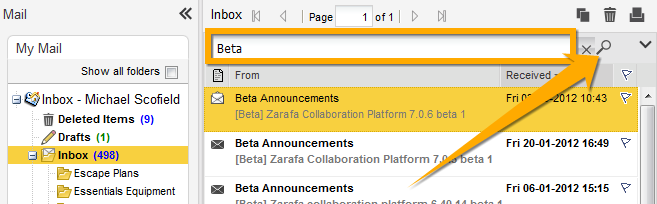
In the Zarafa WebApp, the email view has a default layout: a list of messages with a From and a Received colomn. However, like in Outlook, it is possible to change the view by adding or removing columns. To do so, use the right mouse button to click on the headerarrow of the list (for example on the From header field) and select the Columns option from the context menu. A dialog that looks like Figura 3.13, “Field Chooser” will pop up.
Field Chooser
Figura 3.13. Field Chooser

Additionally, it is possible to sort the email list by selecting a specific column. By default email is sorted by the Received date column.

3.4.3. Searching in WebApp

To search click the Search button in the tool bar. A seach bar (see: Figura 3.14, “Searching Options”) will then be added to the WebApp view (to remove the search bar, click the Search button again).
Searching options
Figura 3.14. Searching Options

The seach bar allow a user to enter a search query and choose where to search. For example if a user remembers just a part of a message’s subject he can select Subject from the pull down menu. After the query is keyed in the user should click the Search button (looking glass icon) on the seach bar, or press the enter on the keyboard. As shown in Figura 3.15, “Search Result”, the email list is updated with the results of the search query.
Search Result
Figura 3.15. Search Result

When finished searching press the Clear button (X icon) to return to the normal list view. To remove the search bar click the Search button in the tool bar again.

Nota

Archiving functionality is provided by the Zarafa Archiver, a product that will be offered separately from ZCP.

3.4.4. Downloading Attachments in WebApp

Attachments can be downloaded one by one, by right-clicking the attachment and selecting Save target as.