Configuring a device for Z-Push is simply a case of adding a Microsoft Exchange or Corporate account to your connected accounts. The connection will be configured by specifiying the IP address or hostname of the server running Z-Push. Please disable SSL, unless SSL has already been setup on the Apache server. Apart from username and password some clients also ask for your domainname. This is ignored inside of Z-Push, so you can either leave it empty or give a random string for it.
Once the mobile device has been setup, it should be possible to synchronise the device simply by clicking the Sync button in your client application.
8.2.1. Android based configuration
The following steps are applicable for most Android devices:
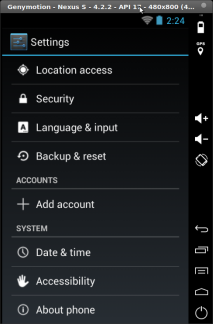
Go into your settings screen and scroll down to the accounts part. There you have to select Add account.
Figuur 8.1. Android Settings
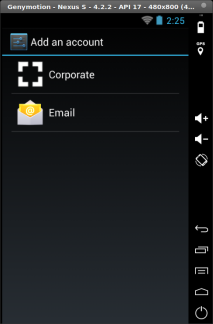
Select the ActiveSync account type (in most cases Corporate or Microsoft Exchange).
Figuur 8.2. Account Type Selection
Android wants to autodiscover your ActiveSync server and needs your eMail and password for this.
Figuur 8.3. Account Details
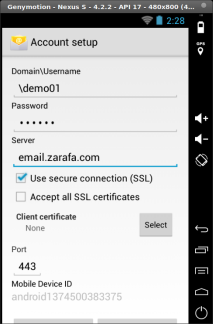
Afterwards you have the possibility to specify your exact username and server address if needed (would otherwise have been m.scotfield as username and zarafa.com as server address).
Figuur 8.4. Server Address
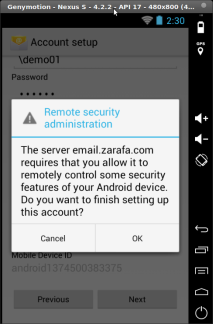
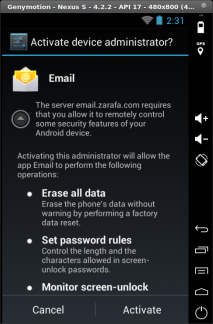
As soon as you have clicked next your device will give you a popup notifying about needed policies for the server connection. You will be prompted to accept these policies later in the setup.
Figuur 8.5. Remote Administration
Before accepting the sync policies you have to choose the frequency for checking the server (Push by default) as well as what to sync (for example contacts and calendar).
Figuur 8.6. Sync Frequence and other settings
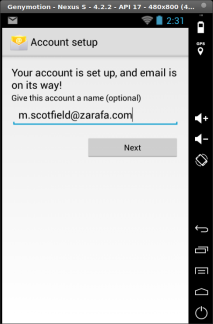
If you have multiple accounts connected to your device you can also specify an identifying name for your connection.
Figuur 8.7. Optional Profile Name for the Connection
Finally accept the server policies.
Figuur 8.8. Accept Server Policies
After accepting the policies for device will perform an initial sync.
Figuur 8.9. Your device has been configured
8.2.2. Windows Mobile based configuration
De volgende stappen zijn gemaakt voor de Pocket PC, maar het is nog steeds van toepassing op WM 5/6 en Nokia's 'Mail for Exchange':
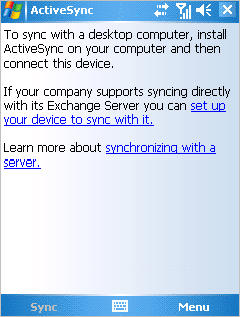
Open ActiveSync en selecteer Stel uw apparaat in om mee te synchroniseren.
Figuur 8.10. ActiveSync introductie
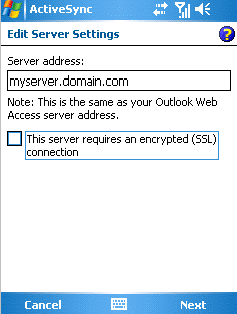
Vul het server adres in (zonder http of andere URL delen).
Figuur 8.11. Server adres
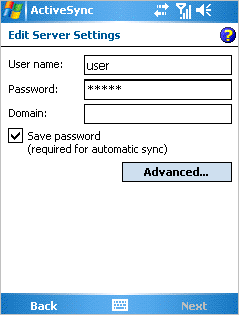
Specifeer een gebruiker en wachtwoord, een moet gespecificeerd worden maar wordt niet gebruikt binnen Z-Push, Kies daarom domain of een ander willekeurige string tekst. Selecteer wachtwoord opslaan als automatisch synchroniseren gewenst is.
Figuur 8.12. Account details
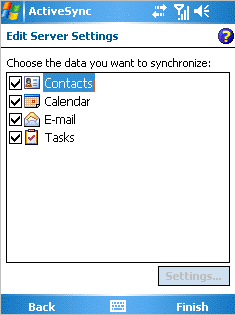
Selecteer de items die gesynchroniseerd moeten worden.
Figuur 8.13. Synchronisatie opties.
Klik Einde en begin met synchroniseren door op Sync te kklikken.
8.2.3. iPhone gebaseerde configuratie
De volgende stappen zijn van toepassing op de iPhone:
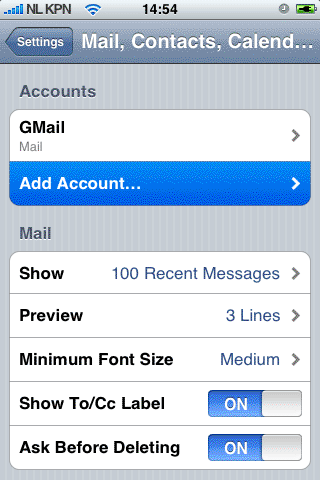
Open Instellingen en raak E-mail, Contactpersonen, Agenda aan.
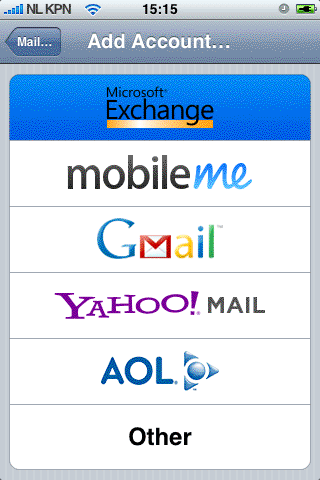
Raak Account toevoegen... en Microsoft Exchange aan.
Figuur 8.14. E-mail, Contacten, Agenda instellingen
Figuur 8.15. Keuze Protocol/provider
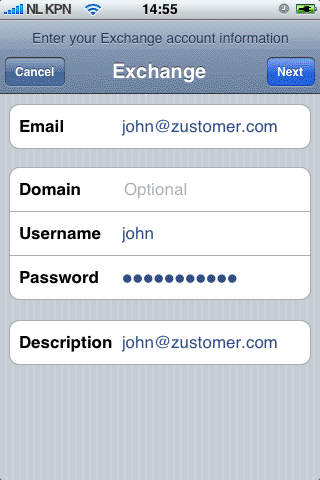
Vul de gegevens in van de gebruiker en raak Volgende aan.
Figuur 8.16. Gebruiker instellingen
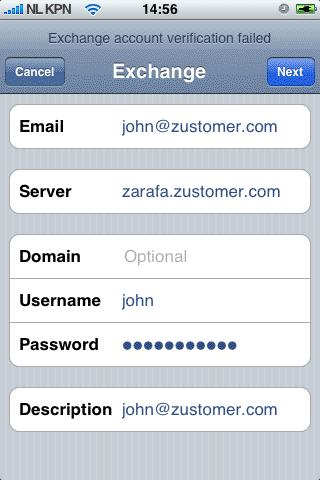
Het apparaat probeert contact te maken met de server. Als de server niet gelijk is aan customer.com dan faalt de verbinding. Als de server niet geconfigureerd is voor SSL verbindingen zal de verbinding ook falen. De iPhone gebruikt standaard een SSL verbinding.
Een nieuw keuzeveld Server zal verschijnen. Geef het correcte server adres of IP adres in indien nodig.
Figuur 8.17. Extra server veld
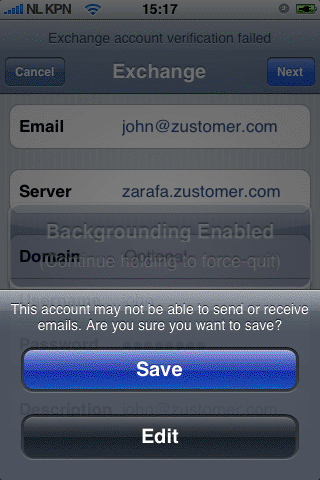
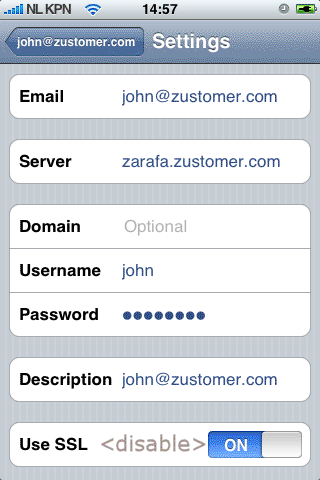
Als SSL niet beschikbaar is kan er geen verbinding tot stand komen. Raak Opslaan aan om de huidige account instellingen op te slaan. Ga naar het gemaakte account en raak Account informatie aan en schakel Gebruik SSL uit.